The Mimics
The Mimics
Overview
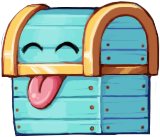
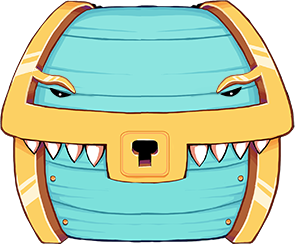
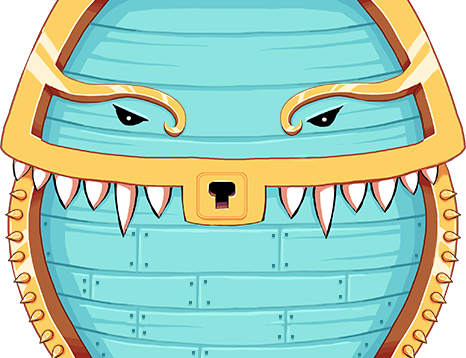
The Mimics are bosses in Tai Ming fought in rapid succession. Despite being separate bosses; the Mimics are all the same entity. The fight consists of three phases, each containing different attacks and enemies. If the player fails any of the phases, they must restart from the first phase.
Story
After defeating Zhamla Meer, the player is cast back in time where a previously locked door sits open. Inside, there is a blue chest containing 'The Crown'. Before the player can claim the artifact however, the chest comes alive and swallows it again, revealing itself to be a Mimic. The fight then ensues. Once the player has defeated the Mimic and returned to their own time, they leave to report their findings to HQ.
Description
"Mimics were created as a defense system against would-be thieves, but were quickly outlawed for public use and saved for only the most sensitive of treasures.
The one sleeping in the depths of Tai Ming went mad from holding The Crown, and over a thousand years it fed on its surroundings and grew until it was too large to move.
Imagine the confusion it must have felt during battle: its foes disappearing with no trace just before the killing blow, only to reappear hundreds of years later to continue the battle! Poor Mimic."
Abilities
Stage 1: Mimic
| Mimic | |
|---|---|
| Level | 10 |
| Health | 9000 |
| Weakness | None |
| Resistance | None |
| Found in | Tai Ming |
Chomp
The Mimic will charge at the player, dealing contact damage. After taking a significant amount of damage, the Mimic becomes enraged for several seconds. When enraged, the Mimic turns red and attacks significantly faster. Perfect Guarding this attack temporarily stops the Mimic in place, giving the player an opportunity to charge skills or spells.
Stomp
The Mimic will quickly jump up and attempt to stomp the player. This can either be on the player's head or on the floor (the yellow targets) and cause shockwaves in the 8 cardinal directions. Perfect Guarding these shockwaves reflects them in the opposite direction. These reflected projectiles are unlikely to hit the Mimic, due to this attack's fast nature.
Final Wave
At low health, the Mimic will return to it's original position and create a gigantic shockwave that stretches out to fill the room. Attempting to shield this shockwave will crush the player's shield. If the Player is in the bottom left or right corner, they will not get hit by this attack. Any other locations will be hit by this attack.
Stage 2: Elder Mimic
| Elder Mimic | |
|---|---|
| Level | 10 |
| Health | 9000 |
| Weakness | None |
| Resistance | None |
| Found in | Tai Ming |
Stomp
Similar to the previous phase, the Elder Mimic will attempt to crush the player three times by jumping above them and slamming down. Unlike the previous phase, this attack does not create shockwaves. This attack can not be shielded, and should be dodged instead.
Gobble
The Elder Mimic will spew out treasure and items. This includes a line of coins and experience. The coins and experience can be picked up, although they should not be a priority. The Elder Mimic will then follow the line and gobble up the items on the floor. Depending on the item it eats there are various effects:
- Gold Coin: Used only as a point of reference or junction. Has no bearing on the attack.
- Gold Medal: After ingesting, the Elder Mimic will create a shockwave that spreads in the 8 cardinal directions. These shockwaves can be reflected with a Perfect Guard.
- Sand Timer: After ingesting, the Player's movements will be temporarily slowed.
- Chili Pepper: After ingesting, the Elder Mimic launches fireballs near the player, with the targets being visible as red circles. When the fireballs land they create patches of damaging fire that linger for a short duration.
- Bomb Box: After ingesting, the Elder Mimic launches bombs to random locations. These bombs explode after a short wind-up.
Final Volley
At low health, The Elder Mimic returns to its original position and launches a flurry of bombs. These bombs are sent in mini-waves, allowing the player a small window to attempt to dodge them. After these waves, a final volley is launched covering the entire floor with bombs. As long as the player stays near to one of the final bombs released, they will not take damage.
Stage 3: Ancient Mimic
Regurgitate
| Ancient Mimic | |
|---|---|
| Level | 10 |
| Health | 9000 |
| Weakness | None |
| Resistance | None |
| Found in | Tai Ming |
The main attack of the Ancient Mimic. The Ancient Mimic will expel a large number of items, monsters, and destructible obstacles into the arena, including:
- Monsters: Occasionally, the Ancient Mimic spews common enemies from previous areas. This can include Slimes, Boars, Guardians, Echoes of Madness, Toxic Flowers, and many more.
- Bosses: On rare occasions, the Ancient Mimic releases bosses the player may recall. The two bosses are the Giga Slime (or Enraged Giga Slime in Hard Mode), and Living Rune Block from Seasonne. It is recommended the player defeats these first, as they have the highest potential to kill you.
- Slime Chunks: Between waves of minions, the Ancient Mimic spews large slime chunks. These create large patches of slowing slime when they connect with the floor (similar to the Giga Slime). If the player is hit, it will trap them in a slime cube that the player must escape to become mobile again.
- Bombs: Later into the fight, the Ancient Mimic launches a number of bombs. These work in the same manner as the bombs from the last phase; landing and then exploding after a short duration.
- Poison Bombs: Between waves of minions, the Ancient Mimic will expel a number of poisonous orbs. These orbs explode into poisonous gas on impact.
- Missile Barrage: Between waves of minions, the Ancient Mimic will expel volleys of missiles. These missiles behave much like GUN-D4M's, launching and striking the reticles on the floor.
Regurgitate (Final)
When the Ancient Mimic's health is entirely drained it begins its final attack. At this point, for a short duration it will expel a large number of the previously mentioned items in numerous waves. It will combine any number of Slime Chunks, Bombs, Poison Bombs and Missile Barrages in an effort to damage the player. This attack lasts for a short while before it erupts into Dragon's Breath. It is recommended to dodge the poisonous clouds and bombs, because they pose the largest threat.
Dragon's Breath
As a final resort, the Ancient Mimic will spew great Dragon's Fire. The fire will work its way from the sides of the screen, growing until the player is seemingly engulfed. Thankfully, as long as the player doesn't move from the center of the screen they will not take damage. Once this attack is over, you have bested the Mimic(s)!
Strategy
Stage 1: Mimic
This phase is not too difficult. Just keep on the Mimic and use your shield to slow it down when it gets enraged. Perfect Guarding will give you even more of a chance to make your move. The main difficulty is the shockwaves. If you can't dodge them, shielding will block the shockwaves. Perfect Guards will use less shield hp, allowing you to block more.
Stage 2: Elder Mimic
Back with a vengeance, this phase is much harder. For this, you will want to try and use the limitations of the boss' attacks to your advantage. When it spews out items, prepare your positioning to dodge and defend. Survival should be your main priority. When it goes for a Stomp, quickly move to avoid taking damage. After its third stomp, it will sit still momentarily. This is your time to hit hard. Don't try to stay on it for too long as it will move very quickly. If the shockwaves still give you trouble, shielding them is easier than dodging them. Focus on dodging and defensive tactics and this phase shouldn't be too much of a problem.
Stage 3: Ancient Mimic
Even harder than before. The main benefit of this form is that it is stationary. The boss does not move to attack you, giving you a good area to work with. Focus on the minions it spawns as the minion spawning is tied to its health. Focus on the minions until they are all defeated, then go for the boss until it spawns the next wave. Doing this ensures you aren't overwhelmed. Furthermore, the Boss' other attacks are much easier to dodge without the threat of the minions and are very predictable. Most of the damage from this fight is from the minions and bosses. It's final attacks are very simple to avoid. Just combine your knowledge of the prior attacks and your skill at dodging from fights like Gun-D4M and Zhamla. After that, the Dragon's Breath attack is quite simple, just follow the attack as it closes in and once you are in the circle, you are done.


